Saturday, May 5, 2012

Surprise! It's a Bouncing Baby...

Hi, remember me? Cheryl Cavanaugh? Wife, mother of 2 rambunctious boys, stay at home mom, and photographer on the side? Wow! I can't believe I've let so much time pass since the last time I posted. I could sit here and make excuse after excuse but the truth is......Life. Just. Happens. It has been a whirlwind of activity around here and I've hardly had a chance to take a breath. The more time that passed the more anxious I became about writing a catch up post. So much to cover!! Christmas, New Years, birthdays, an anniversary, Valentine's Day, and all the precious moments in between.

And then I realized this is my blog. There is no reason to start stressin' when I step away for a little while. And why in the world do I feel like I have to play catch up when I've been MIA? Who said I had to?

Exactly. No one. So here we are in the now and I have been a busy little bee prepping. Oh that's right. We have a new addition to the family and a cute little addition I must say. He is so soft, quiet, and cuddly. We are so in love with this little guy. So without further hesitation I'd like to introduce the world to (drum roll please)


Bob. Bob the Bunny. Is he not the cutest thing you've ever seen! I've always said that this house is off limits to anymore animals until the cats die. Don't get me wrong. I love my cats and I don't want them to die anytime soon but they are a handful. I somehow always get animals with strange, off the wall personalities. Chloe, my oldest cat, is a straight D.I.V.A. The world is hers and everything should go her way. She is overweight, likes to sleep on your neck, will bust a hole through all your window screens and knocks over any cup that has liquid in it.

Then there's Galina our second cat. When Jacob was deployed and I was working all day, I thought Chloe was lonely at the house all by herself. One of my fellow teachers had a litter of kittens so I took one. My earth science students named her Galina after a mineral that produces a silver streak on an unglazed porcelain plate. Dorky I know but they were so excited when they came up with that name. I brought Galina home thinking Chloe would finally have a playmate and wouldn't you know they hated each other. They still hate each other to this day. Anywho, Galina is a bipolar cat on crack. She races around the house all day, literally climbs door frames, shower curtains, and will climb into tiny spaces that she can't wiggle her way out of. She is also relentless when it comes to stealing my husband's boot straps.


I never thought I would have another animal. I mean cleaning up after 2 kids and 2 cats......

So how did this rabbit come to live with us? A friend of mine got a rabbit and once I saw it I was in love. I never had a bunny growing up. Oh I straight jumped on it when she said she could get one for us. Her bunny is totally chill. He lies around, letting anyone hold him, stays in his cage and is just all around awesome. Why would my bunny be any different? They came from the same family right?

So we started putting together his cage. My friends had a great, inexpensive idea for creating the perfect rabbit habitat.

1. Purchase a $20 small animal playpen. They have panels that can be removed or added to make the cage as big or small as you need. The top is open but the sides are high making it difficult for animals to escape.

2. Purchase a $2 tarp from Walmart. Cut a piece of the tarp to fit the width and length of the playpen. Actually cut it a little bigger so it will stretch a little ways up the sides of the playpen.


Clip the tarp to the playpen with clothes pins. Super simple, super cheap, my kinda style =)

3. Add some finishing touches like a hay manager, salt wheel, paper shavings, somewhere for him to snuggle, and you're good to go.


I don't have a picture of the final product but his cage took up a whole entire corner of Matthew's room.


You would think Bob the Bunny would be happy with his larger than life cage.

You would think.

I was watching TV one night and heard a strange noise coming from Matthew's room. I walked in and there he was. Bob. On Matthew's bed. Homeboy straight scaled the sides of his cage. He was just sitting there on Matthew's bed looking at me with his beady little red eyes. I could see his thought process.....Yeah lady, that's right. You can't hold me down. Catch me if you can, I dare ya. No, check that I double dare ya.

Oh yes, I stared at this bunny and that entire conversation totally went through my head.

Remember what I said, I always get the weird animals. Most people would say to just get a rabbit cage with a top and call it a day. Well that's what my husband said at least. I don't like a lot of the cages out there. I think they are too small and cruel. The huge ones sell for $200 bucks or more and I'm not going to drop that kind of money. So I had to go with Plan B. If Bob the Bunny was going to be hopping around freely, he needed to be potty trained.

What's that you say? Potty train a bunny? Yes ma'am, that's right. What? You don't believe me?


You go Bob. A little privacy please =)

It's not like litter training a cat. You have to place boxes in areas where your rabbit likes to go. We have one in the dining room, the bathroom, on the lanai, in Nicholas's room and in his new cage. Thankfully most of them are somewhat hidden and Bob's litter doesn't stink, make too large of a mess and is super simple to clean. Much easier than a cat's litter box.

So I thought I could rein Bob in by litter training and strategically placing baby gates throughout the house.

So I thought.

One afternoon the cats were sitting outside the laundry room acting all funny. I step over the baby gate and this is what I find.


Bob hopped the baby gate, took over the laundry room, and now thinks he is a cat. Chloe and Galina get along with Bob but not when he is eating their food.


And occupying their space behind the washer and dryer.

We can keep a pretty good eye on Bob when we're home but I don't want him in the laundry room when we're away. If he chews through the power cord to the washer or dryer.........no bueno.

It was time for Plan C. Use the litter boxes and baby gates and design a large cage fit for a rabbit king. So it began.

I've never attempted to build a structure that needed to be somewhat structurally sound. So what better way to start than by designing a 3 story bunny cage with a built-in litter screen, hinged door, ramps and a sleeping loft. I mean go big or go home, right?

Keeping true to my style it needed to be inexpensive. My goal was to learn how to use a circular saw, utilize metal ties and connectors, make minimal measurement mistakes, and come in under $70. Done, done, done, and not so done. My final cost was $102. Not my idea of cost effective but at least it was cheaper than buying a wood, tri-level bunny cage. The whole process took me a week. I could lie and say that it took so long because I had to take care of my kids while trying to work power tools but I'll be honest. There were so many times I just sat there thinking how in the f*** am I going to make this work.

My final product looks nothing like the original sketch but hey, it's done. Well, almost. I still have to finish the top.

First up was the frame. I had planned to use hard wire cloth for all four walls. After completing one side I realized that it was going to take a lot and that mess is expensive. Enter OSB board to the rescue at $6 for a huge slab. Not so cheap to polyurethane but it had to be done. I didn't want urine soaking into the boards....gag. Of course my clumsy self spilled a can so I had to buy another one.


Then I sat down again and thought how in the hell am I going to do a built in litter screen so that I can slide a litter pan in and out from under the cage.


I added some extra 2 x 2's underneath so the entire structure would sit off the ground giving me the space I needed to slide a thin litter pan in and out.

Then I sat down, once again, to think through how I was going to build in 2 more levels. I had to think for a long time. I'm really more of an arts and crafts kinda gal.....

I wish I could provide detailed instructions just in case someone else wanted to attempt this bunny cage but I was simply going with the flow. I went where ever my thought process took me and somehow, someway, it worked.


Add in a few ramps with grip support


And voila!


Yes, that is Bob happily staying in his cage even though the door is open. Yes, it is now May (I started this back in Feb.) and I haven't finished the top and yes, as of right now those are my pie pans serving as the litter box. No need to fret, it will one day get done. I still consider this project a total success.

I learned to use a circular saw which to this day still scares me. I have a tendency to not pay close attention and the finality of the blade coming into contact with a finger.....well it still crosses my mind every time I take the saw out of the box. I've conquered the weird feeling of intimidation that the wood section of Lowes used to instill in me. Don't deny it ladies. You know you've felt that way at least once. I now know the awesomeness of ties/connectors which are extremely handy when attaching multiple wood pieces at different angles. And lastly, I've learned about chicken wire vs. hardwire cloth. It doesn't seem like a big deal but go ahead and run your hand over chicken wire and then drag your hand across hardwire cloth. Now imagine an animal's nose or foot dragging across and tell me which one you would choose. I'm just say 'in.


I'm sure people from Pinterest will stumble across this post and possibly be aggravated when they learn that I don't offer detailed instructions on how to make this bunny cage. My advice? You. Don't. Need. Them. Grab a cup of coffee, pen, paper, and start sketching what you want and go from there.

Because my final product


Looks nothing like my original sketch and I'm OK with that. Have a great weekend!

~Cheryl

Sunday, December 4, 2011

Tis the Season to Share My Recipes

My favorite time of the year is finally here. From Thanksgiving on out it's all about friends, family, and of course food. I love to cook, love to try new recipes and if I'm feeling brave I might even try flying solo in the kitchen. Most of my own concoctions wind up being disastrous but at least I try.

Right about now North Carolina is starting to get pretty chilly which is perfect for covering up the extra poundage. How can someone NOT put on LBs during this time of year? There are just so many reasons to eat: Thanksgiving, Christmas Eve, Christmas Day, New Year's Eve, Christmas parties, sweet treat, wine and appetizer exchanges, etc.

Back home I would just throw on a pair of jeans, a Columbia fleece, and I wouldn't worry about fitting into summer clothes until May. But here, in the eternal land of summer called Florida, we are still rocking out the shorts, tank tops, and flip flops. Luckily I found a group of women that have somehow convinced me to run a half marathon in March. You would think I would use all the training exercise as a way to drop those dreaded "last 5 pounds". You would think......However, in my mind it is a reason for me to indulge in the flavors of the season just a little bit more. But hey, as long as I'm not gaining =)

I've had quite a few people ask about my recipes so here they are. All of them have been tried and stamped with my approval. Or as in the case of the damn cake balls, stamped with contempt.

Apple-Sage Roasted Turkey

1/2 cup apple cider or juice
1/2 cup apple jelly
1/3 cup butter, cubed

TURKEY:

1/3 cup minced fresh sage
1/4 cup butter, softened
1 turkey (14 to 16lbs)
2 Tbsp. apple cider or juice
1 1/2 tsp. salt
1 1/2 tsp. pepper
2 large apples, cut into wedges
1 large onion, cut into wedges
8 fresh sage leaves


COMBINE APPLE CIDER, JELLY AND BUTTER in a small saucepan. Cook and stir until butter is melted. Remove from the heat and set aside. Reserve 2 Tbsp. for finishing.

COMBINE MINCED SAGE AND BUTTER in a small bowl. With fingers, carefully loosen skin from the turkey breast; rub butter mixture under the skin. Brush turkey with apple cider. Sprinkle salt and pepper over turkey and inside cavity(remove icky goody bag from the cavity first).

PLACE APPLES, ONION, AND SAGE LEAVES inside the cavity. Tuck wings under turkey; tie drumsticks together. Place breast side up on a rack in a roasting pan.

BAKE UNCOVERED AT 325 for 3 1/2 to 4 hours or until a meat thermometer reads 180, basting occasionally with cider mixture. Cover and let stand for 20 minutes before slicing.

*Next year I'm going to place him directly in the pan so he can cook in his own juices and oils, adding chicken broth as needed. Fighting over the golden brown skin is to be expected at the dinner table*


*************************************************
The Best Sweet Potato Casserole Ever

Potatoes

2 pounds sweet potatoes, peeled and chopped
3/4 cup granulated sugar
1/4 cup evaporated low-fat milk
3 Tbsp. butter, melted
1/2 tsp. salt
1 tsp. vanilla extract
2 large eggs
cooking spray

Topping

1.5oz all purpose flour(about 1/3 cup)
2/3 cup packed brown sugar
1/8 tsp. salt
2 Tbsp. melted butter
1/2 cup chopped pecans

Preheat oven to 350.

To prepare potatoes, place potatoes in a Dutch oven; cover with water. Bring to a boil. Reduce heat, and simmer 20 minutes or until tender; drain. Cool 5 minutes.

Place potatoes in a large bowl; add granulated sugar, evaporated milk, 3 Tbsp. melted butter, 1/2 tsp. salt, and vanilla. Beat with a mixer at medium speed until smooth. Add eggs; beat well. Pour potato mixture into a 13x9 inch baking pan coated with cooking spray.

To prepare topping, weigh or lightly spoon flour into a dry measuring cup; level with a knife. Combine flour, brown sugar, and 1/8 tsp. salt; stir with a whisk. Stir in 2 Tbsp. melted butter. Sprinkle flour mixture evenly over potato mixture; arrange pecans evenly over top. Bake at 350 for 25 minutes or just until golden.

Preheat broiler (remove casserole first).

Broil casserole 45 seconds or until the topping is bubbly. Let stand 10 minutes before serving.

*Tis the season to NOT use anything fat free or low fat. I use regular evaporated milk and it works great. I usually do half pecans and half without. I have also used marshmallows instead of pecans but just be careful during the broiling process*


********************************************

Traditional Stuffing

1 bag(15oz) herb-seasoned stuffing
1/3 cup chopped parsley
12oz bulk pork sausage
3 Tbsp. butter
2 cups chopped onion
1 cup chopped celery
1 can(140z) reduced-sodium chicken broth
1 1/4 cups water

Heat oven to 350. Grease a shallow 3-qt baking dish.

Put stuffing mix and parsley in a large bowl. Heat a large nonstick skillet over medium heat. Add sausage and cook over medium-high heat, breaking up meat with a wooden spoon, 6 minutes or until cooked through. Add to bowl with stuffing

Melt butter in same skillet. Add onion and celery, and cook over medium heat, stirring occasionally, 10 minutes or until tender. Add broth and water, stirring to remove any browned bits. Add to bowl.

Gently toss to mix. Spoon into baking dish and cover with foil. Bake 30 minutes. Uncover and bake 15 minutes more or until lightly browned.

*As stated above, I will not use "reduced" anything. Regular chicken broth works just fine. Add chicken broth as needed if your casserole becomes dry while baking. Anyone who is as addicted to stuffing as I am knows that it's all about the crunch of celery. Add extra*


***************************************************

Cranberry Sauce

2 bags(12oz each) fresh cranberries
2 cups water
1 3/4 cups sugar
1 tsp. grated orange zest

Place all ingredients in a large saucepan and bring to a boil. Reduce heat and simmer 15 minutes or until most of the cranberries have burst.

Remove from heat. Cool slightly, then refrigerate covered for up to 2 weeks.

*I use way more orange zest than the recipe calls for. Pretty much the whole orange peel. I also slice one side of the orange and squeeze the juice into the saucepan. Fish out any seeds*


***********************************************

Red Lobster Cheddar Biscuits

INGREDIENTS

2 1/2 cups Bisquick baking mix
3/4 cups cold whole milk
4 Tbsp. cold butter (1/2 stick)
1/4 tsp. garlic powder
1 heaping cup grated cheddar cheese

BRUSH ON TOP

2 Tbsp. butter, melted
1/4 tsp. dried parsley flakes
1/2 tsp. garlic powder
pinch of salt

Preheat oven to 400
Combine Bisquick with cold butter in a medium bowl using a pastry cutter or a large fork. You don't want to mix too thoroughly. There should be small chunks of butter that are the size of small peas. Add cheddar cheese, milk, and 1/4 tsp. garlic salt. Mix by hand until combined but don't over mix.

Drop approx. 1/4 cup portions of the dough onto an ungreased cookie sheet using an ice cream scoop.

Bake for 15 to 17 minutes or until the tops of the biscuits begin to turn light brown.

When you take the biscuits out of the oven, melt 2 Tbsp. butter in a small bowl in your microwave. Stir in 1/2 tsp. garlic powder and the dried parsley flakes. Use a brush to spread this garlic butter over the tops of all biscuits. Use up all of the butter.

*I like my biscuits extra flavorful so I make double the garlic butter topping. Bottom of the biscuits have a tendency to brown quickly so be watchful*


****************************************

Marinated Cheese

2 blocks (8oz each) white cheddar cheese
2 pkg. (80z each) cream cheese, softened
3/4 cup chopped roasted sweet red peppers
1/2 cup olive oil
1/4 cup white wine vinegar
1/4 cup balsamic vinegar
3 Tbsp. chopped green onions
3 Tbsp. minced fresh parsley
2 Tbsp. minced fresh basil
1 Tbsp. sugar
3 garlic cloves, minced
1/2 tsp. salt
1/2 tsp. pepper
Toasted sliced French bread or assorted crackers

Slice each block of cheddar cheese into twenty 1/4 inch slices. Cut each block of cream cheese into 18 slices; sandwich between cheddar slices, using a knife to spread evenly. Create four 6 inch long blocks of cheese; place in 13x9 inch dish.

Combine the roasted peppers, oil, vinegars, onions, herbs, sugar, garlic, salt and pepper; pour over cheese. Cover and refrigerate overnight, turning once. Drain excess marinade. Serve cheese with bread or crackers.

*This recipe is straight up a serving of bigger thighs with a side of arteriosclerosis. Make sure you drain the excess marinade or you will get a mouthful of olive oil. Yes it happened to me and I still shudder thinking about it. I love balsamic vinegar so I always add extra*


*****************************************
Deviled Eggs

7 eggs
Salt
Pepper
Paprika
Mayo
Mustard
Sweet Relish
Splenda

Boil the eggs for a minimum of 10 minutes. Drain hot water and soak eggs in cold water until they are cool to the touch. Peel eggs and slice in half long ways. Place all yolks in a small bowl and add all the ingredients above to taste. Place mixture back into hollowed eggs. Cover and refrigerate until ready to serve.

*I have yet to meet someone who does not like these little devils. Make sure to add only small amounts of Splenda at a time, mixing well between each addition. A little goes a long way. Expect people to sneak into the fridge when you're not looking. The deviled eggs have a way of disappearing before they even make it to the table*


(photo courtesy of the Internet. Recipe is from Emily G. of Jacksonville, NC)

***************************************
Cherry Cordial Cake Balls

I need to throw in a few disclaimers before we get started on the cake balls from hell.....

1. If you are a recovering alcoholic ~ this recipe is not for you
2. If you do not have 5 hours to devote ~ this recipe is not for you
3. If you do not have someone to watch the kids ~ this recipe is not for you
4. If you are not an avid baker ~ this recipe is not for you
5. If you believe you are a kick ass baker ~ this recipe still might not be for you

If, after all that, you are still interested.....well....don't say I didn't warn you.


INGREDIENTS

1 pkg. (18 1/4oz) fudge marble cake mix
1 1/4 cups plus 3 Tbsp. strong brewed coffee, divided
1/4 cup canola oil
3 eggs
1 jar (10oz) maraschino cherries without stems, well drained
1/3 cup brandy
1/4 cup cherry preserves
1 cup canned chocolate frosting
4 lbs. milk chocolate candy coating, chopped
2 Tbsp. shortening

In a large bowl combine cake mix, coca packet, 1 1/4 cups coffee, oil, and eggs; beat on low speed for 30 seconds. Beat on medium for 2 minutes. Pour batter into a greased 13x9 inch baking pan. Bake at 350 for 30-35 minutes or until a toothpick inserted near the center comes out clean. Cool.

Place cherries in a food processor; cover and process until coarsely chopped. Transfer to a small bowl; stir in brandy, preserves and remaining coffee. Crumble cake into a large bowl. Add frosting and cherry mixture; beat well. Shape into 1 inch balls.

In a microwave, melt candy coating and shortening; stir until smooth. Dip balls in chocolate mixture; allow excess to drip off. Place on waxed paper; let stand until set. Store in an airtight container overnight before serving.

Here are some of the issues I had with this recipe:

1. The smell of brandy was so strong that it kept triggering my gag reflex. Ugh, I kept having flashbacks of being hungover in college after slamming So Co and Lime shots all night. (insert goosebumps, shiver, and a slight gag here)

2. It is so hard to roll the mixture into balls. It sticks to you, itself, everything.

3. Candy coating is NOT the same as milk chocolate morsels but I think I had more success with the latter.

4. The candy coating is super thick even though you thin it with shortening. When you dip the cake balls they fall apart in the chocolate.

5. Don't think you can make the dipping process easier by placing cake balls in the fridge to harden them up. They will instantly solidify the chocolate coating when you dip them.

6. Keep in mind there is a point of no return when it comes to thinning the candy coating with shortening. You can easily end up with a watery mess.

7. Do not add water to the candy coating to thin it out. I would have known better had I read the instructions on the package before attempting this. Water will ruin all 4 lbs of chocolate.

8. I'm serious about needing 5 hours to complete this recipe. My first attempt began at 6pm and didn't end until almost one in the morning.


Let's see, is there anything else? Nope, I think that covers it.

Once I cleaned up "The Great Chocolate Massacre of 2011", plated my cake balls, and drank a big glass of wine, I had to give myself a pat on the back.


They were beautiful and looked like I had spent hours making them. Yes, the end part of that comment is dripping in sarcasm.


There are a few upsides to this recipe. The serving size is 60 balls which is perfect for cookie exchanges. You can place 10 of them in a Christmas tin and BAM! You have 6 gifts for neighbors, co-workers, etc. Not only are the pretty but they taste pretty dog on good too. The only reason why I would attempt this recipe for a 3rd time would be because a lady accused me of buying them from the store and trying to pass them off as my own.

If you only knew lady, if you only knew.


(This recipe was provided to Taste of Home by a Mrs. Susan Westerfield of Albuquerque, New Mexico. Should you attempt these cake balls, please direct all hate mail in that direction)

********************************************
Every few weeks 15 or so of us women get together for breakfast after dropping the kids off at school. The person hosting doesn't have to worry about anything except providing coffee and drinks. Those attending take care of bringing food. The first breakfast I attended I opted to bring a casserole and a different kind of muffin. I have made the breakfast casserole the past two years for Chistmas morning. It's an excellent option because you put it together the night before. The muffins are also a good option for Christmas morning because they are super easy to prepare.

Delux Breakfast Bake

1 pkg.(6oz) onion and garlic salad croutons
2 cups(8oz) shredded cheddar cheese
1 1/2 cups cubed fully cooked ham
4 eggs
2 3/4 cups milk, divided
3/4 tsp. ground mustard
1 can(10 3/4oz) condensed cream of mushroom sou[, undiluted
1 pkg.(26oz) frozen shredded hash brown potatoes, thawed
1/2 tsp. paprika
1/4 tsp. pepper

Place croutons in a greased 3-qt baking dish. Sprinkle with cheese and ham. In a large bowl, whisk the eggs, 2 1/4 cups milk and mustard; pour over ham and cheese. Cover and refrigerate overnight.

Remove from the refrigerator 30 minutes before baking. Combine soup and remaining milk until blended; spread over casserole. Top with hash browns; sprinkle with paprika and pepper.

Cover and bake at 350 for 30 minutes. Uncover, bake 35-40 minutes longer or until edges are browned. Let stand for 10 minutes before serving.


(photo from magazine)

**********************************************

Eggs in Muffin Cups

12 thin slices deli roast beef
6 slices process American cheese, quartered
12 eggs

Press one slice of beef onto the bottom and up the sides of each greased muffin cup, forming a shell. Arrange two cheese pieces in each shell. Break one egg into each cup. Bake uncovered, at 350, for 20-25 minutes or until eggs are completely set.

*I bake the muffins less than what the recipe calls for because we like our yolks slightly runny. If you do bake for 20-25 minutes you can bank on having a very solid center*


(photo from magazine)

So there you are, my seasonal recipes.

Cook 'em
Eat 'em
Love 'em
Share 'em

~ Cheryl

Monday, October 24, 2011

Fall Is Finally Here.......I Think

Oh wow.......I thought I was doing so good by publishing 2 blog posts in one week....like a month ago(as you can tell by the name of this blog which doesn't exactly fit anymore considering it's closer to winter, but whatev =).

When people ask me if I'm enjoying Florida I usually give some rave response. However, I have one complaint. Where in the hell is fall? Where are the golden orange, burnt red leaves? Where is the crisp, cool air that has an underlying sent of moist soil and decomposing leaves with a hint of wood burning smoke? Where is it? I don't know and I don't like it. This place has 2 seasons. Hot as hell and hot. Not cool my friends not cool......

I didn't even put up fall decorations. We did carve a pumpkin but that thing rotted in like 2 days because of the heat and humidity. If it weren't for the fall activities, well, it wouldn't even seem as if fall were here, as if Halloween existed, and Thanksgiving would be more of a distant memory from some long forgotten time. I have had to FORCE myself to get into the fall spirit.

One way to make Halloween feel real in the land of eternal summer(yes I know Halloween was almost a month ago but I'm playing catch up here)......was to bake cookies with Matthew.


I originally planned on making the dough from scratch but with school, playdates, MNI, MNO, and craft projects I just didn't have time. Toll House.....I can always count on you. YOUR MY BOY BLUE!!


(photo by Jacob Cavanaugh)

Out of all the Halloween shapes available my son wanted to make ghosts. He has been addicted to ghosts for the past 2 years and I don't see it coming to an end anytime soon.

I rolled out the cookie dough and using the cutter we made some pretty good looking ghosts.


Or so I thought. No one told me that you should roll pre-made dough super thin or else this would happen......


Homeboys straight BLEW. UP. But that's OK. Once you slap some icing and chocolate chips on them they look fantastic. Well, at least in Matthew's eyes they do.


~~~~~~~~~~~~~~~~~~~~~~~~~~~~~~~~~~~~~~~~~~~~~~~~~~~~~~~~~~~~~~~~~~~~~~~~~~~~~~~~~~~~~

We also attended a fall festival at the Methodist Church on Bloomingdale Ave. It was one of the first things we did with some of the other moms at Matthew's school. Since this we have done so much more together and I've truly enjoyed getting to know these women, their families, and watching our kids become friends with one another.


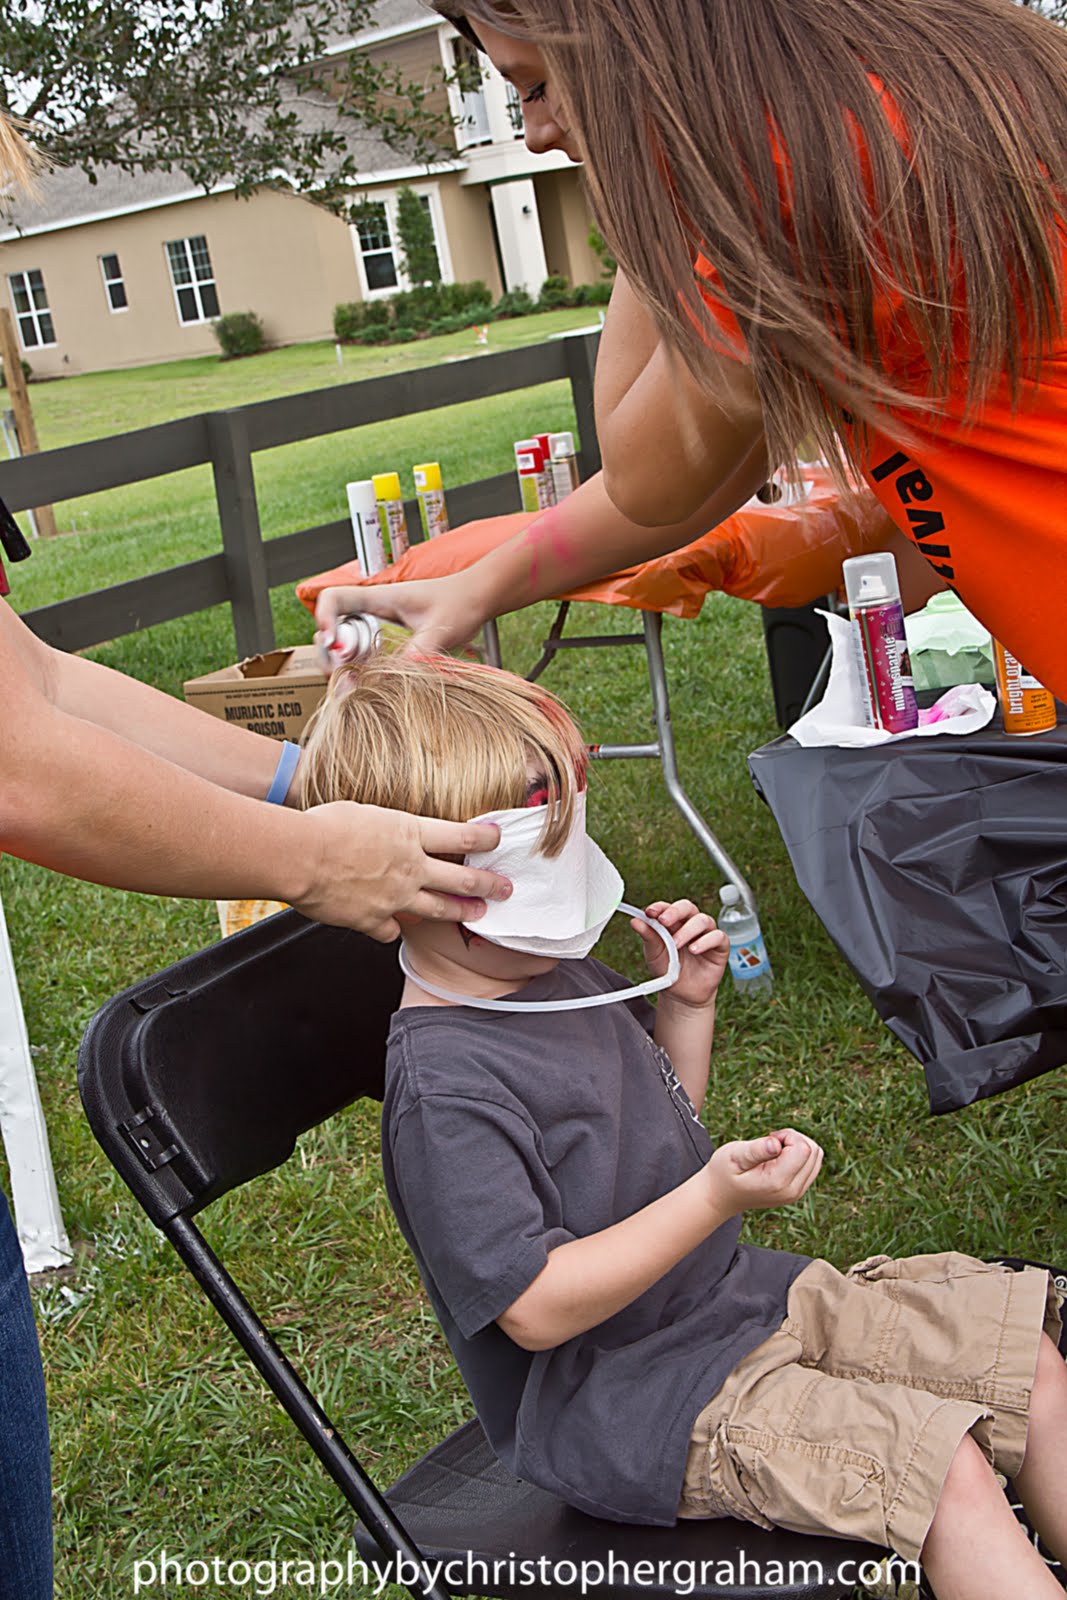
Kuddos to the Methodist Church for having put together an awesome fall festival. There was face painting


He likes it? He likes it not. He likes it? He likes it not :)


Next up....


And last but not least.....I'm really proud of you Matthew. This was the first time you ever had your face painted. We tried before but you just wouldn't have it. YAY to you bud!!


After face painting it was time to pick our pumpkins. All of us moms tried to keep a rule in place. You can pick it as long as you can carry it.

And then they were off.....trying to find the biggest pumpkin they could carry.


I think it's safe to say that the Methodist Fall Festival was a success.


~~~~~~~~~~~~~~~~~~~~~~~~~~~~~~~~~~~~~~~~~~~~~~~~~

Being new to the area we decided to give trick-or-treating in Hyde Park a try. Look, I only have 3 pictures from this and we learned not to do it again. Kids dress up and they go to each of the stores in Hyde Park collecting candy. There was one bounce house for the hundreds of kids there, it was hot, and it took us 2 hours to get a sandwich for lunch.


Yup that's it. That's all I have to say about trick-or-treating in Hyde Park. Lesson learned and we will not be doing this next year.

~~~~~~~~~~~~~~~~~~~~~~~~~~~~~~~~~~~~~~~~~~~~

However, the Fishhawk Festival was awesome. Fishhawk is a large community with their own little downtown, neighborhoods, schools, etc. The festival they put on each year is open to the public and our family had a wonderful time. We got there pretty early which was nice because there were no crowds which meant Nicholas could be free of his stroller for awhile and wander around.

Fishhawk advertises their festival as free and it is if the only thing you plan to do is walk around. They had easy kid games and activities set up but you had to have tickets and to get those tickets you had to make a donation. To this day I'm still not sure exactly what cause I donated to. Twenty bucks I think got us twenty-five tickets and they lasted awhile.


When we got there Nicholas straight took off. We thought he just wanted to run around but quickly realized that he was headed for the music stage. Oh it was too funny! He ran up to the stage, threw his hands up in the air, and started turning in circles which was clearly his version of dancing. Nicholas is totally different than his brother. We jokingly call him "a walking keg party". The world is his playground and everything in it is his toy. Mom and dad, if you're reading this I have a feeling Nicholas is going to be payback for all the hell I put you guys through=)


We had to put Nicholas in his stroller once the crowds started trickling in. There wasn't really anything for Nicholas' age but there was plenty for Matthew to do.

They had a make your own cupcake stand and were not stingy about how much stuff you could pile ontop. Matthew was content with just icing but of course I convinced him to add more. Since I'm so frugal I figured we needed to get our 3 tickets worth.


Once again Matthew surprised me by letting people spray paint his hair. I didn't think my super cautious son would go for it.


First time face painting and hair spraying in one day? I'd say he's on a roll in the adventure department. You might think I'm being sarcastic but I'm not.

Matthew played all the games, did the trick or treat street(getting candy from all the vendors promoting their businesses), played in the bounce house, and carved a pumpkin with daddy. Well daddy did most of the carving because they were using actual knives instead of the kid friendly carving kits.


Even though the Fishhawk Festival didn't start until 5pm, the pumpkin carving started at 9am and here's why. They take all of the carved pumpkins and put them on levels of scaffolding boards. When the levels are full and it's dark they have a pumpkin lighting ceremony.


While waiting for the lighting ceremony we ran into some friends. All of us had the intention of staying for the ceremony but after hours of festival fun we were tired, the kids were tired, and everyone was hungry for something other than candy.


So instead we all left and grabbed dinner together. Check out this sky as we were leaving. The photo isn't edited. It really was that beautiful.


Oh and I have to add that we did all three of those festivals in one day. Some people think we're crazy but I say it's better than going home and sitting in front of the television.

~~~~~~~~~~~~~~~~~~~~~~~~~~~~~~~~~~~~~~~~~~~~~~~~~~~~~~~~~~~~~~~~~~~~~~~~~~~~~~~~~~~~

Later that week Matthew and his friends from school got together to carve the pumpkins they picked out at the Methodist Fall Festival. It started out great and the kids were all into it.


Hold up, wait a minute. Go back and tell me what's wrong with the last picture.

Mmmm hmmm. After 15 minutes we realized the boys were completely MIA and this is what we found.


Who needs pumpkins when you have a room full of Transformers. So us moms were left to finish the job.


Pats on the back ladies for a job well done.


And being the great moms that we are, I guess we'll go ahead and give the kids all the credit.


~~~~~~~~~~~~~~~~~~~~~~~~~~~~~~~~~~~~~~~~~~~~~~~~~~~~~~~~~~~~~~~~~~~~~~~~~~~~~~~~~~~~

Phew! Almost done I promise. Of course fall wouldn't be complete without trick-or-treating. My girl Darcy is always listening to me complain about how no one in our neighborhood comes out of their house. So she invited my family over to grill out and go trick-or-treating in her neighborhood. Her Halloween decorations kick some serious ass.


And the nifty, thrifty thing about her decorating style? She makes them all herself. Pretty talented if you ask me. She has talked me into doing some Christmas decorations and I'll keep you posted on how that turns out.


I heard a lot of parents say their kids only lasted 30 minutes when it came to trick-or-treating. Our kids rocked it for almost an hour and a half. I think we, the parents, were ready to stop before they were.


Oh my gosh and the result of such a long trick-or-treating excursion.....


A bucket full of back fat. And I say that because you know Jacob and I hit up that candy more than the kids did. Don't lie! You know you do it too.

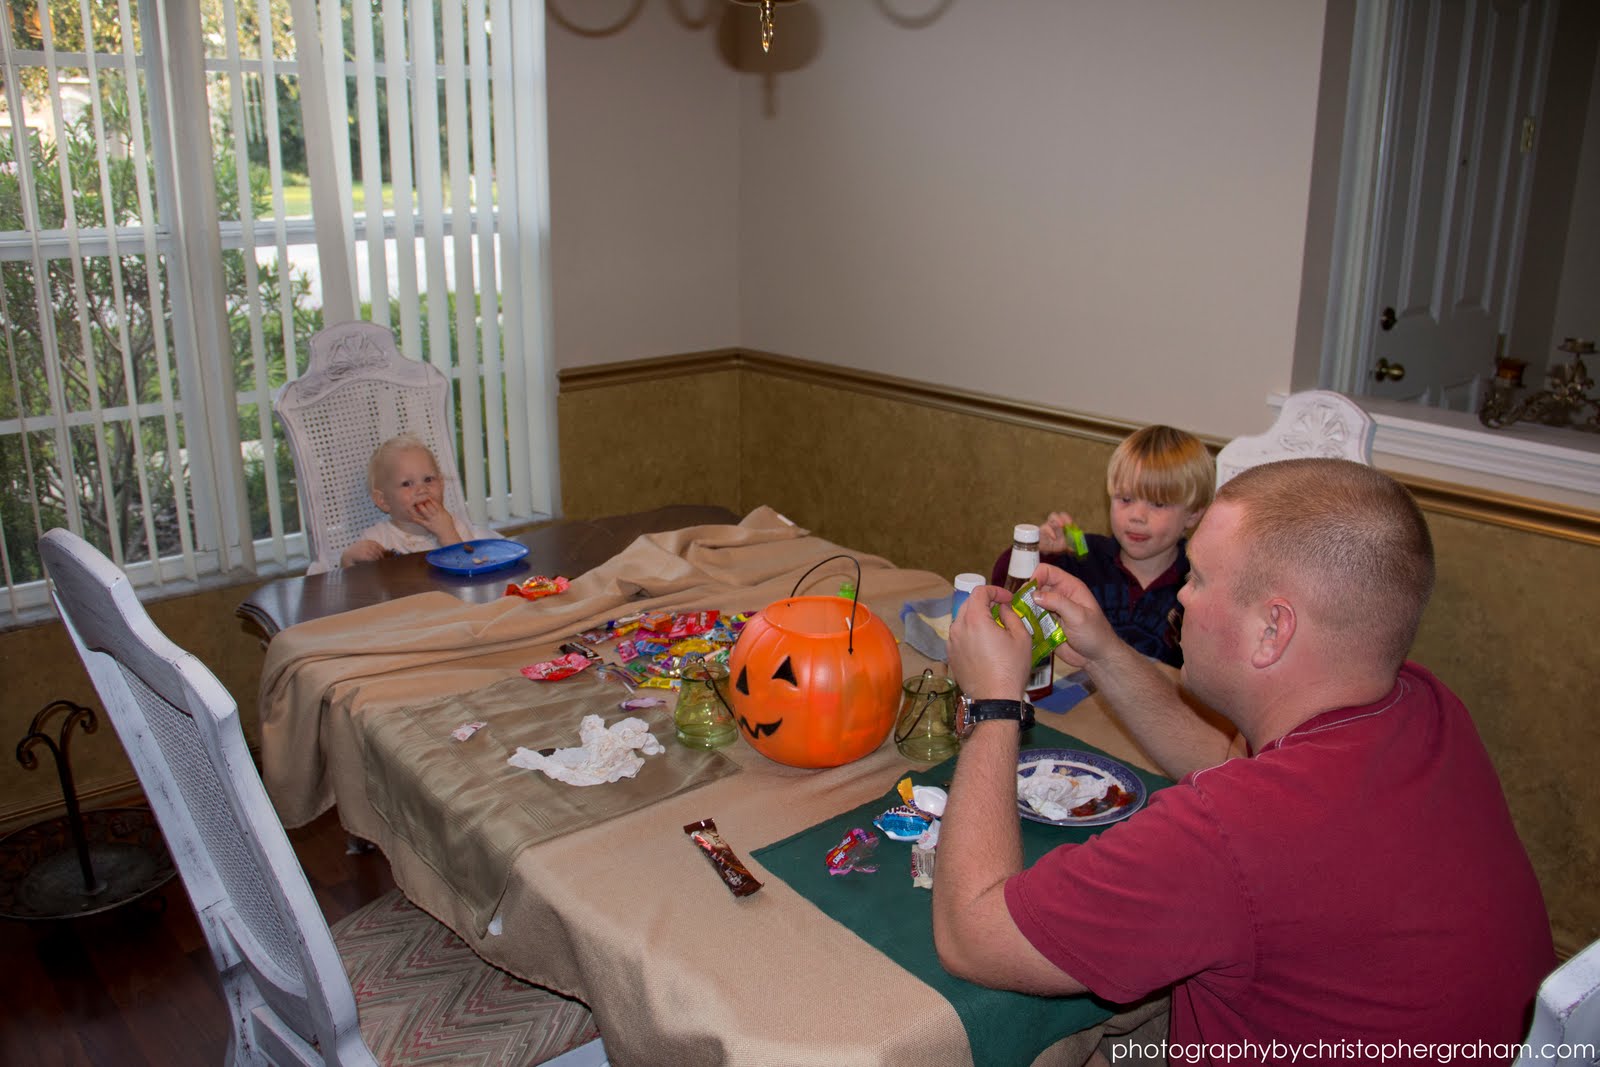
Let me explain our rules when it comes to junk food and candy in the house. We have it, we eat it, and I honestly don't put a limit on how much. I know many parents have rules when it comes to sugary treats. Some only allow a piece after lunch, a piece after dinner, and some even freeze the chocolate so that it lasts for months. You know what? Instead of explaining the rules let me just show you how we get down with candy after dinner.


We just dump it out and get to it. I can't even begin to justify our sugar consumption by saying that we ate some nutritious meal beforehand because by the look of the ketchip on the table I'm guessing we just finished eat either hotdogs or chicken nuggets and french fries =)


And I am totally OK with that. Happy fall ya'll!

My Playlist